Plans and scan allowances
TableScan Studio uses monthly subscriptions. Each plan includes a number of scans per month. Choose the one that fits how often you scan tables.
Monthly Starter Pack
30 scans per month. Best for light use—occasional receipts, small tables, or trying the app.
Monthly Standard Pack
60 scans per month. Good for regular use—meeting notes, weekly worksheets, or medium-volume scanning.
Monthly Power Pack
120 scans per month. For power users who scan daily or handle larger batches.
Monthly Pro Pack
300 scans per month, priority processing, batch mode, and export to Excel, CSV, and Google Sheets.
Upgrade, downgrade & where to buy
Where to buy or change your subscription
- Buy or change a plan inside the app: open Settings (gear icon), then go to the subscription or “Manage subscription” section. All purchases and plan changes go through the App Store.
- Upgrade (e.g. Starter → Standard): your higher plan starts right away. You may get a partial credit for the remaining time on the old plan, depending on App Store policy.
- Downgrade (e.g. Pro → Standard): the change applies at the end of your current billing period. You keep your current plan’s benefits until then.
- Cancel: subscriptions are managed by Apple. To cancel, use Settings → [Your Name] → Subscriptions on your iPhone or iPad, then select TableScan Studio and choose “Cancel subscription.” You keep access until the period you already paid for ends.
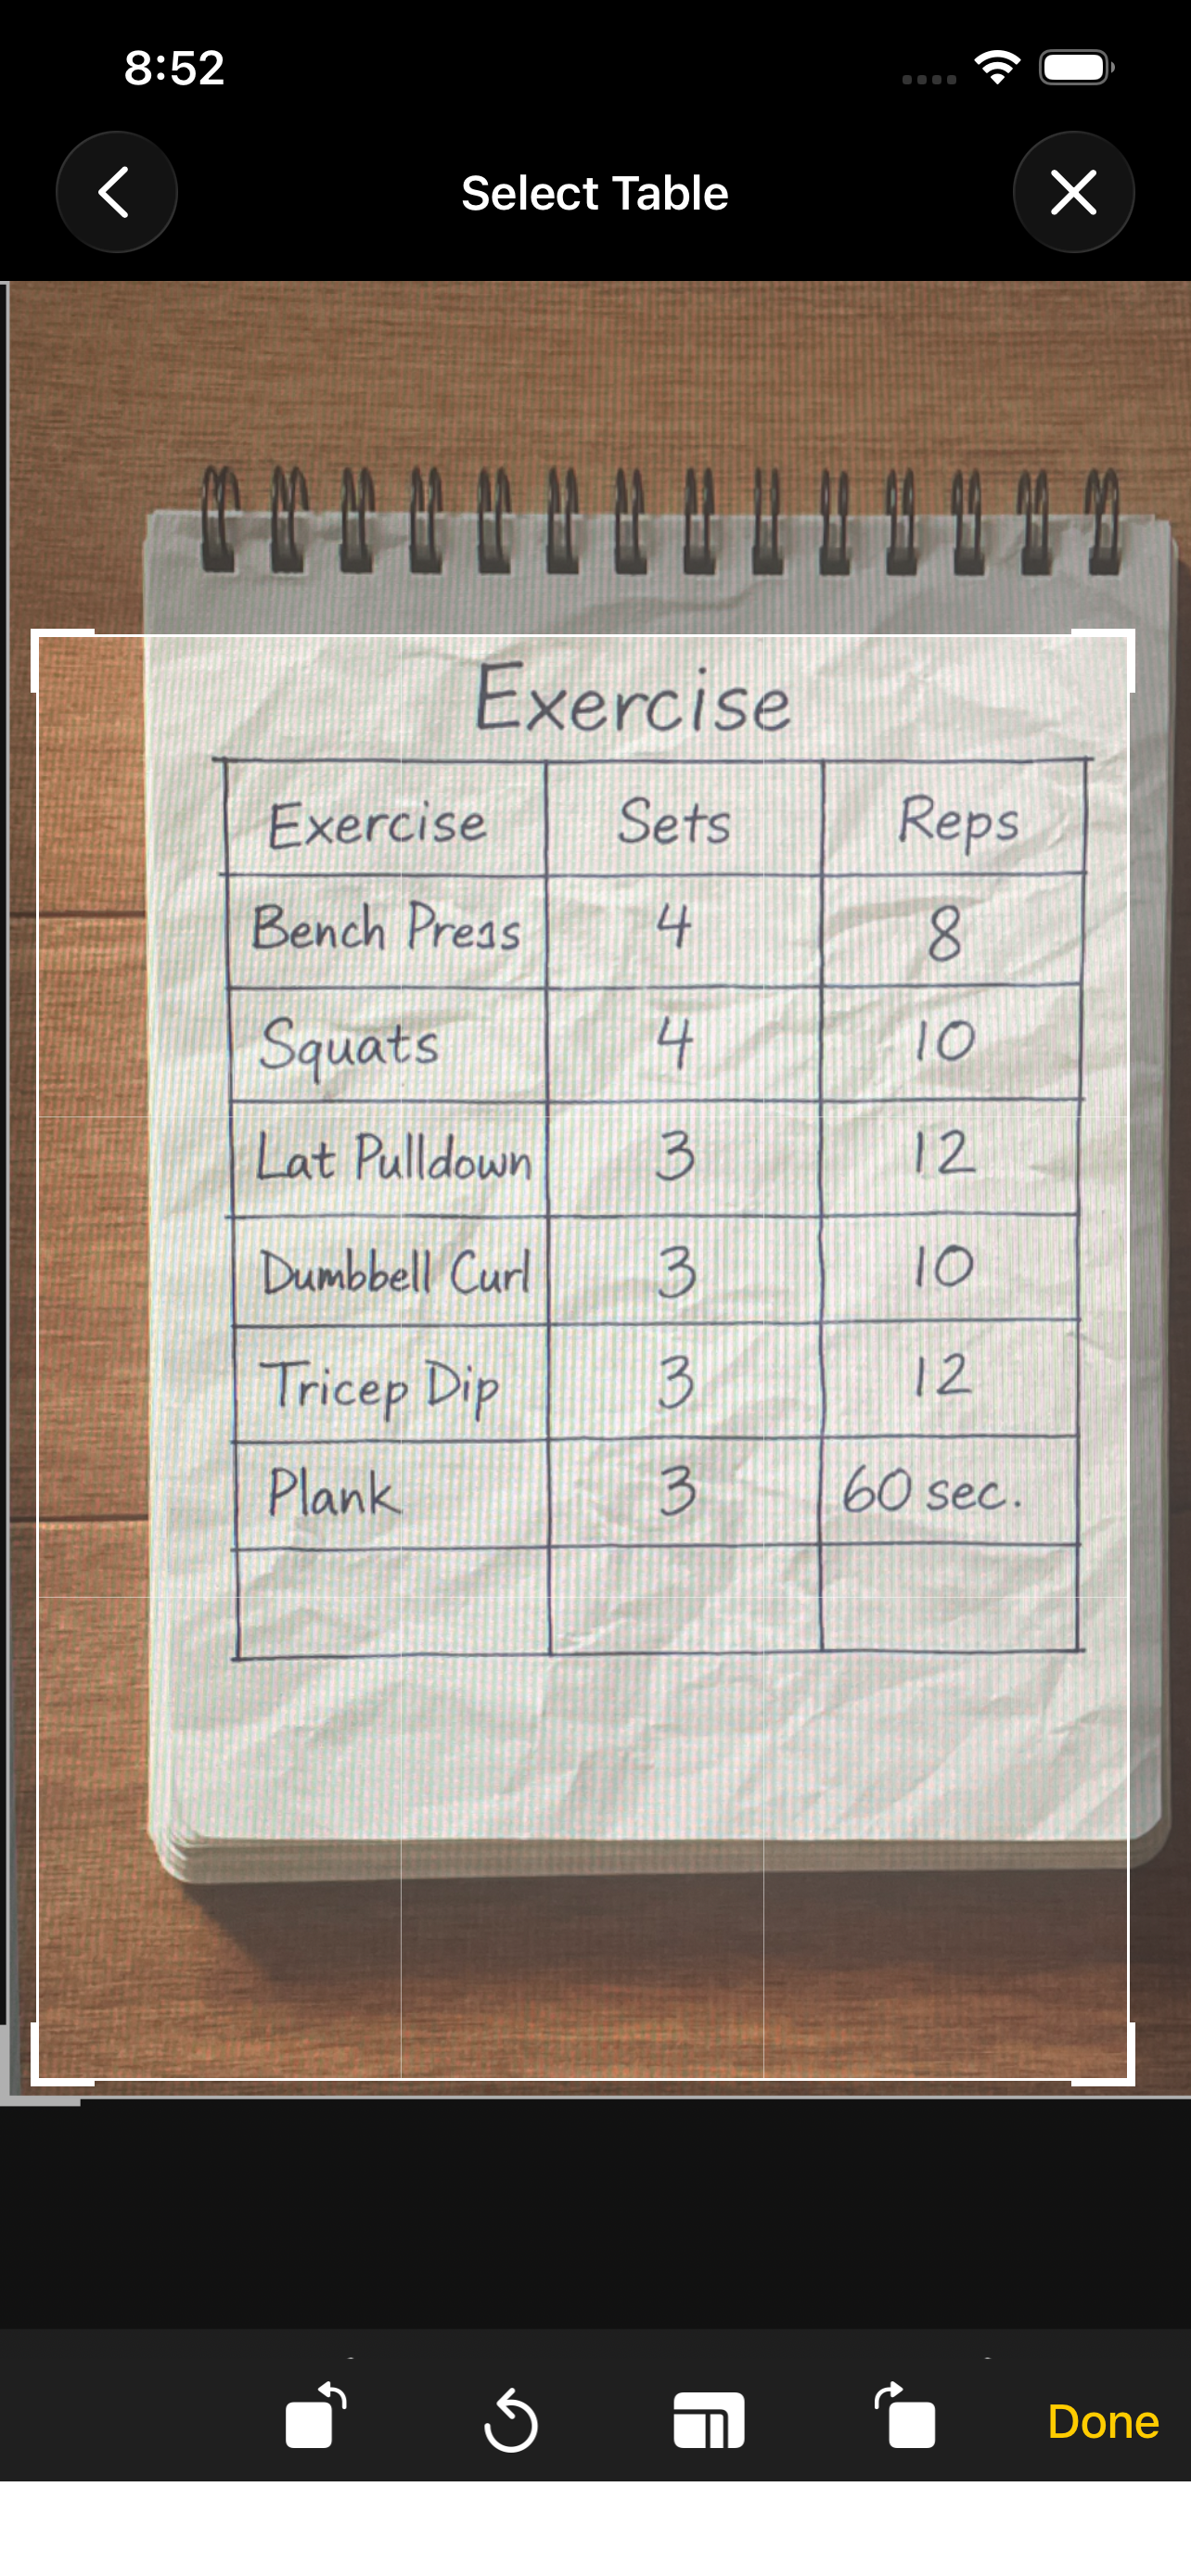
Select Table (crop)
After you take a photo, you see the “Select Table” screen. Use it to choose exactly which part of the image is the table. This step improves speed and accuracy.
Crop to the table area
- Crop tightly around the table. Drag the corners and edges so the frame fits the table (and any headers) and cuts out as much background as possible. Less clutter in the frame usually means faster and more accurate extraction.
- Include the whole table—all rows and columns you care about—so nothing is cut off before processing.
Rotate to upright / portrait
- Make the table upright (portrait or “normal” reading direction) before you continue. Use the rotation controls so the table is right-side up, not sideways or upside down.
- Upright tables are read more reliably by the AI and produce cleaner results in the editor.
Add a screenshot to web/images/crop-tip.png to show the crop frame and rotation controls here.
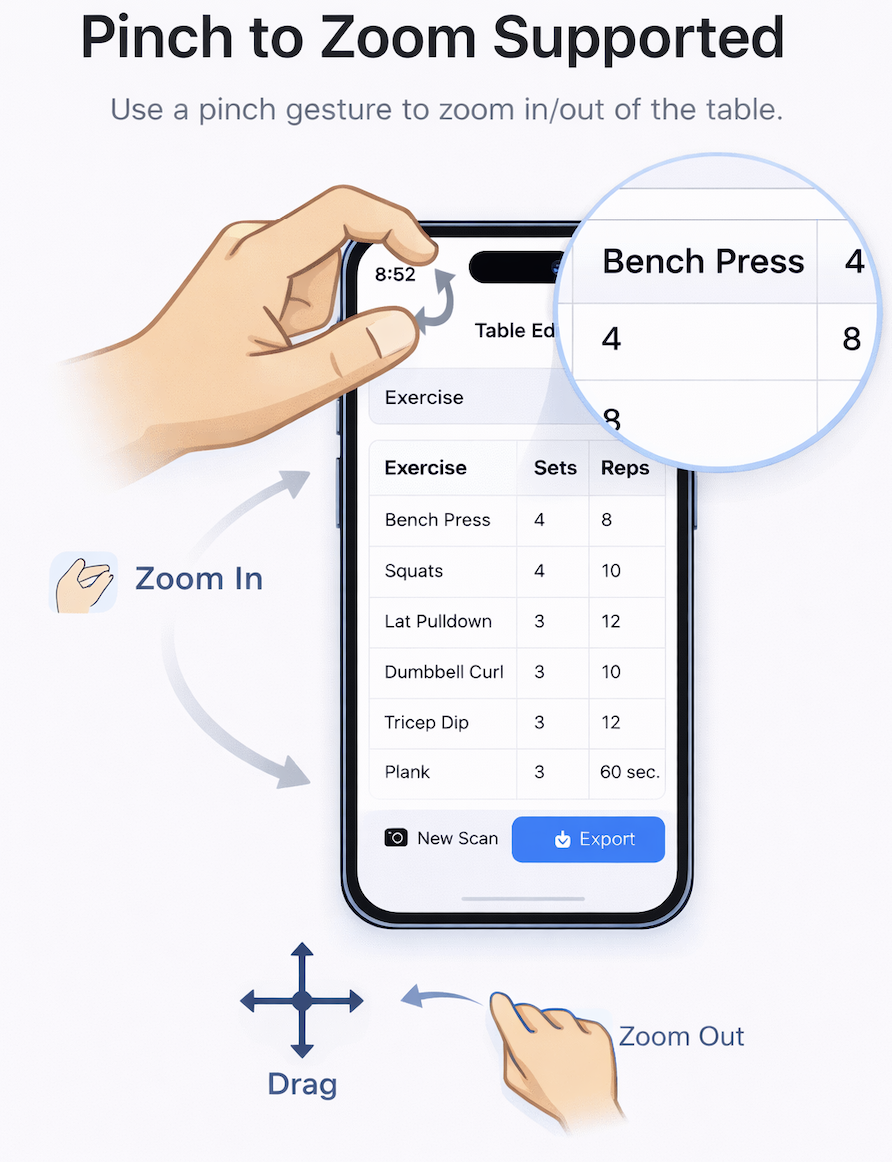
Table Preview
The Table Preview shows the extracted table and any text above or below it. You can zoom and pan to move around and review everything before editing or exporting.
Zoom and pan
- Pinch to zoom — Use two fingers (spread to zoom in, pinch to zoom out) on the table and text area. Zoom range is 50% to 400%, so you can read small text or see the full layout.
- Drag to pan — When zoomed in, drag with one finger to pan around the table. You can move in any direction to bring different parts into view.
- Combine zoom and pan to move around large tables and blocks of text easily.
Add web/images/table-editor-zoom.png to show zoom and drag gestures.
Processing: Table vs List & Continue in Background
While your image is processed, you’ll see a progress screen. When extraction is done, a modal may ask you to choose the content type. You can also choose to let processing continue in the background.
Table vs List (content type modal)
When the modal “Select Content Type” appears, pick how the content should be treated:
- Table — Structured data with a header row. Use this for spreadsheets, price lists, schedules, and anything that has clear columns and rows with a header. The first row is treated as headers.
- List — Sequential items without a header row. Use this for inventories, checklists, bullet lists, or simple one-column lists.
You can still edit the result in the Table Editor, so it’s fine to pick the option that’s closest; you can adjust cells and layout afterward.
Continue in Background
- The “Continue in Background” button appears on the processing screen. Tapping it lets the current job keep running while you leave the screen and use other parts of the app (e.g. go back to Home or open History).
- Benefit: For slower or large jobs, you don’t have to wait on the processing screen. You can start a new scan, review past scans, or change settings. When the job finishes, you can open it from Scan History.
- If processing takes longer than usual, you may also see a dialog: “Processing Taking Longer”. You can choose “Wait” to stay on the screen or “Continue in Background” to leave and come back later.
Scan history & deleting scans
The Scan History screen (history icon in the app) shows all your scan jobs. You can see status, open completed tables in the editor, and remove old scans.
What’s on the screen
- TOTAL PAGES — Total number of pages across all your scans.
- PROCESSING — Number of jobs currently being processed (pending in the cloud).
- A list of each scan job: name, date, page count, and status.
What the status icons mean
Each job has a colored status indicator:
Tap a completed job to open it in the Table Editor. Use the row’s action button (e.g. pencil/edit) when shown to go straight to the editor.
How to delete old scans
- Swipe left on a scan row to reveal the Delete action.
- Tap Delete (or use a full swipe in some layouts) to remove that scan from your history. This cannot be undone.
- Deleting frees space and keeps your history list manageable. It does not change your subscription or scan allowance.
Need more help? Contact us for app support.
Contact Support